Summary: This post explains how to use RLEAPP to process sysdiagnose logs extracted from an iOS device to identify the phone number used in an AirDrop transfer.
Long Version:
Imagine the following scenario… You are sitting in *insert place here* when you get an AirDrop request from an unknown subject containing a potential threat.

There’s nothing they can do to identify this mystery person, right? Wrong! Keep reading to find out!
First, some quick definitions to get us started…
Sysdiagnose Logs
Sysdiagnose logs are a series of logs used to help developers debug their apps. These logs collect so much information that they can be a goldmine of data for forensic examiners.
Sysdiagnose logs are manually triggered by the user or they can also be generated by loading specific iOS profiles.
A lot of research on the forensic use of sysdiagnose logs has been done by Heather Mahalik, Mattia Epifani, and Adrian Leong, including a mind-blowing 73-page paper that is a mobile device forensic “must-read”, along with a series of scripts to parse them.
AirDrop
AirDrop is a native feature in iOS and MacOS that leverages Bluetooth and Wi-Fi and allows users that are in physically close proximity of each other to transfer files in an encrypted manner. Many brilliant examiners have done plenty of research on AirDrop forensics. Some of my favorite articles are:
Sarah Edward’s AirDrop Analysis of the UDP (Unsolicited Dick Pic)
Kinga Kięczkowska’s AirDrop Forensics

Alexis Brignoni created an RLEAPP module based on this research, facilitating what could be a very tedious process.
Methodology:
I know some digital forensics “purists” will scream at the thought of some of the steps suggested here; they will claim that you are working on and “altering” live evidence. Newsflash: You can’t do mobile forensics by connecting a phone to a write blocker, so you are making changes to your evidence anyway.
Also, when you trigger the sysdiagnose logs, you are technically not creating data, but collecting a series of logs that are already present and putting them in a container.
The sysdiagnose logs are extremely volatile so by the time you get back to your lab and wait on a queue of phones (which is common in every forensic lab these days) your precious goldmine of data may have been overwritten.
When you have a dangerous criminal on the run and time is not on your side, you have to make a quick choice, so just make sure to document your steps and the reasons behind them. This is why we test and validate constantly.
The following steps allow for the collection and processing of the "system_logs.logarchive" in order to obtain the sender’s phone number. For this testing, an iPhone 13 Pro running iOS 15.3.1 was used.
1. Generate the sysdiagnose logs
Sysdiagnose logs can be generated by using a combination of buttons, leveraging Accessibility features, or by loading specific iOS profiles. There are several articles such as this one that explain detail how to trigger these logs, so in this post we are just going to summarize a couple of ways:
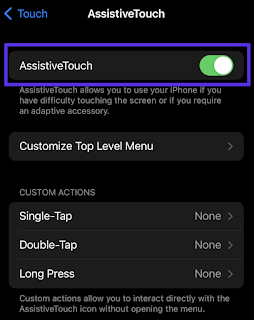
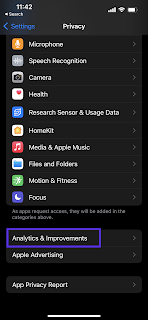
Using Accessibility:
Go to Settings > Accessibility > Touch > Turn on Assistive Touch

I find this way a bit more challenging, but I’m listing it here because some people prefer it, as they feel they are making less changes to the device.
a. Press and hold Vol. Up + Vol. Down + Sleep/Wake (Lock) buttons all at once for approximately ~ 1 second (250 milliseconds according to the blog posts).
b. Wait for approximately 10 minutes for the logs to be generated.
NOTE: ** Don’t be impatient and hold all three buttons forever unless you want a surprise visit from your local law enforcement and you want to scare your emergency contacts… “Accidentally” triggering “Emergency SOS” always makes for a “fun” evening!

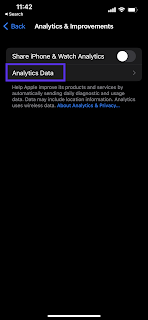
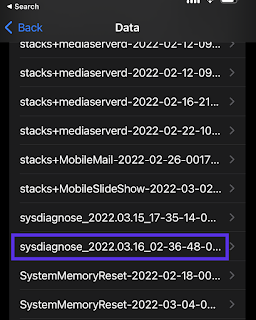
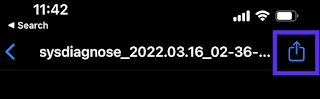
3. Export the sysdiagnose logs to a Mac computer using your favorite method: iBackupBot, iTunes, AirDrop…
I used AirDrop as an example in this post. This may not be the most forensically sound manner, but I just wanted something quick to start looking at these logs. Different methods of exporting sysdiagnose logs are beyond the scope of this post.
log show <path to the system_logs.logarchive> --style ndjson --predicate 'category = "AirDrop"' > airdrop.ndjson
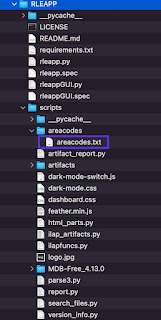
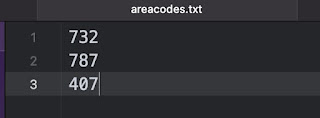
5. Update the “areacode.txt” file with the list of possible area codes you are looking for.
This file is located within the RLEAPP directory, in ‘scripts/areacode/’. While you could technically put every area code in the US, it would cause the RLEAPP module to be REALLY slow… (so use your good ol’ investigative skills to narrow this down).
NOTE: If you truly have no idea what the area code is, I would suggest running the airdropmsisdn script to find the phone number. You will need the target hash start and ending fragments.


Voila!
A very clean output in under 2 minutes!

Note: This process only works if the Apple ID phone number was used to send the file.
Stay tuned for additional research being conducted in case an Apple ID email was used!
As usual, feel free to reach out to me with any questions or comments, this is how we grow as a community.
- A huge thank you to the following people:
- Alexis Brignoni, of course, for sharing this idea with me
- Brandon Epstein, Benjamin Klein, and Derek Feuerstein for writing the paper that inspired this post
- Dan Ogden, for always peer reviewing my work
- Heather Mahalik, Mattia Epifani, and Adrian Leong for sharing their awesome sysdiagnose forensics paper with the community
- Sarah Edwards for all your work related to iOS and Mac forensics, and in this case to AirDrop forensics.
- Kinga Kięczkowska for your post related to AirDrop forensics